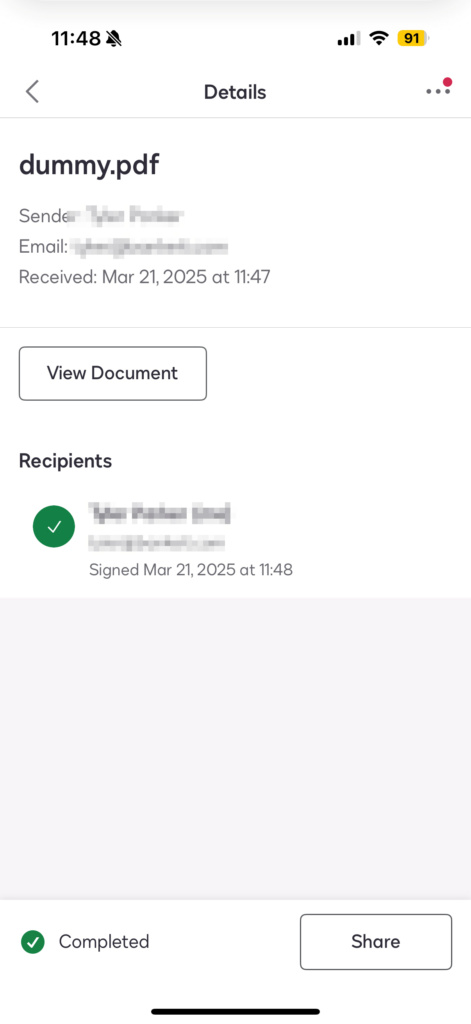
This guide will walk you through signing your own documents using DocuSign. You can create a free account for this here.
Desktop
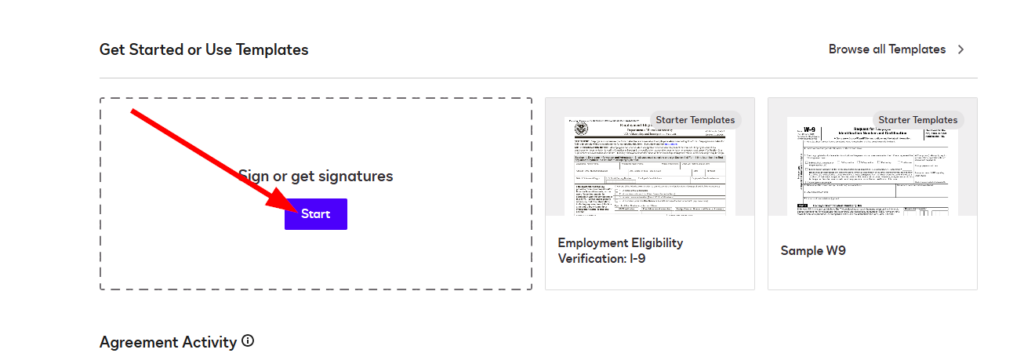
- Click “Start”
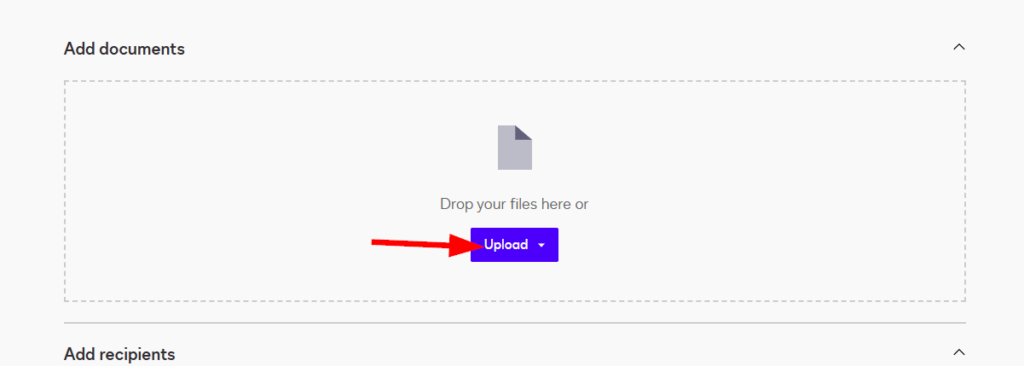
- Click “upload”, then “desktop” and select the file you want to sign
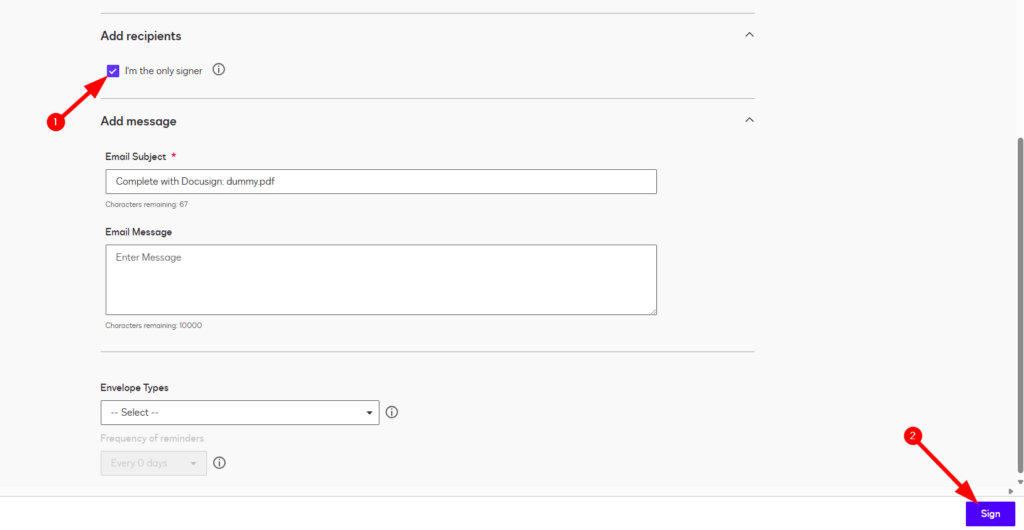
- Check the box for (1) “I am the only signer” then (2) click “Sign”
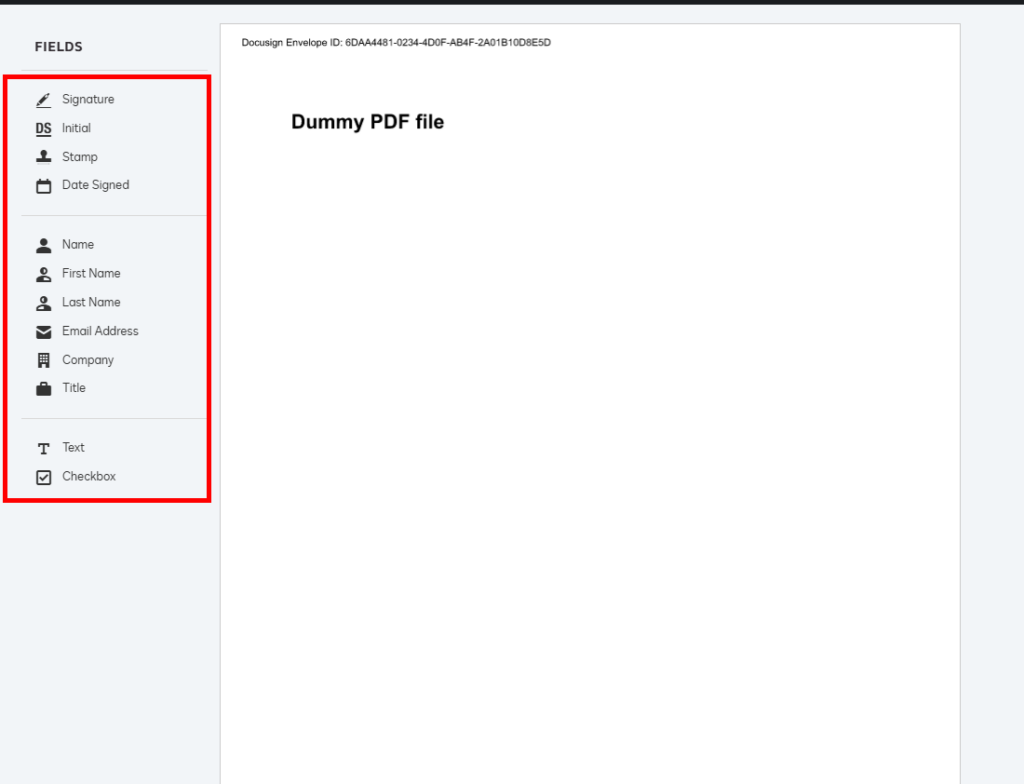
- On the left select what you need, then place it where you want on your document
- When you are done, click Finish in the top right
- Click “No Thanks” to close out of the window

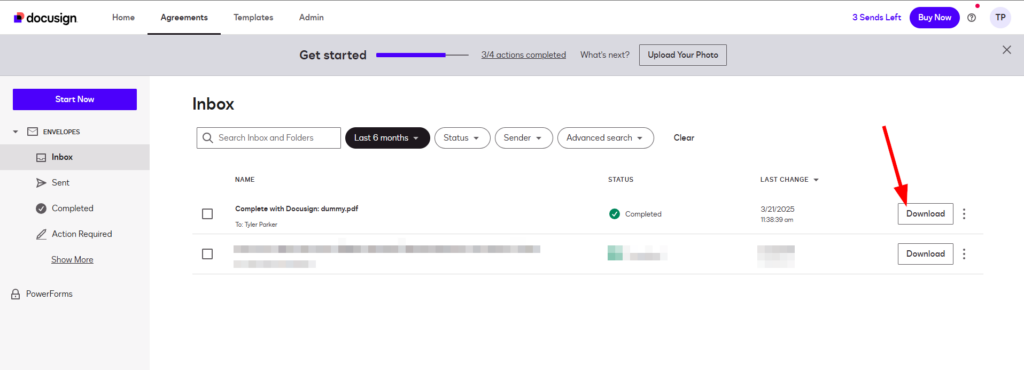
- Now you can click “Download” on your file to save a copy of it to your computer
Mobile App
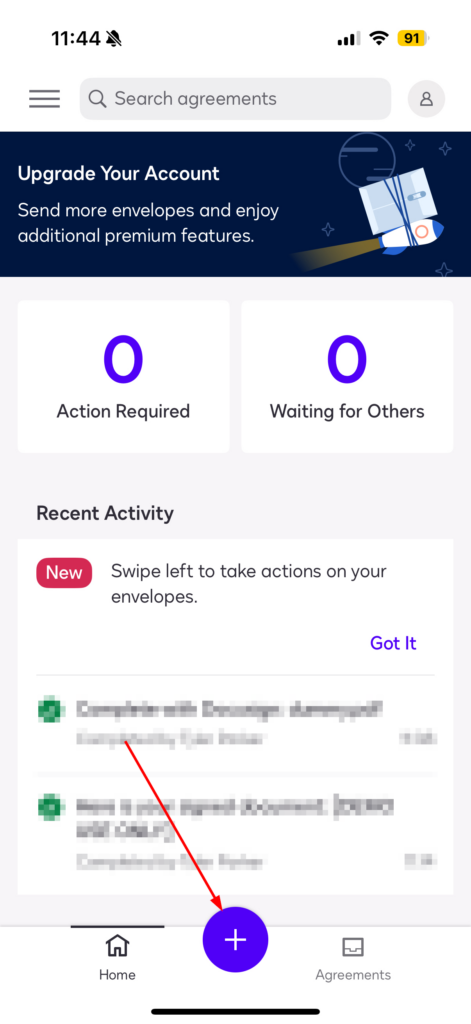
- Click the blue and white plus at the bottom of the screen then select “Sign Document”
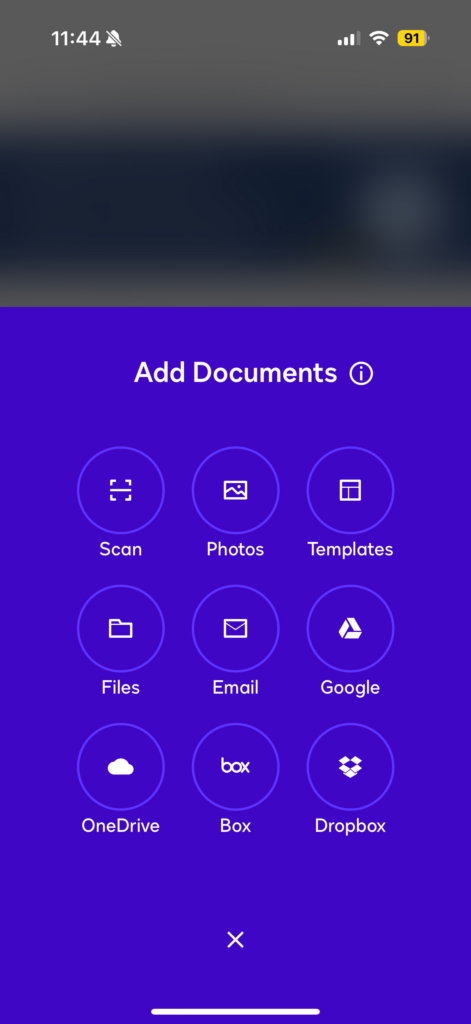
- Select where you have your document(s) then add them
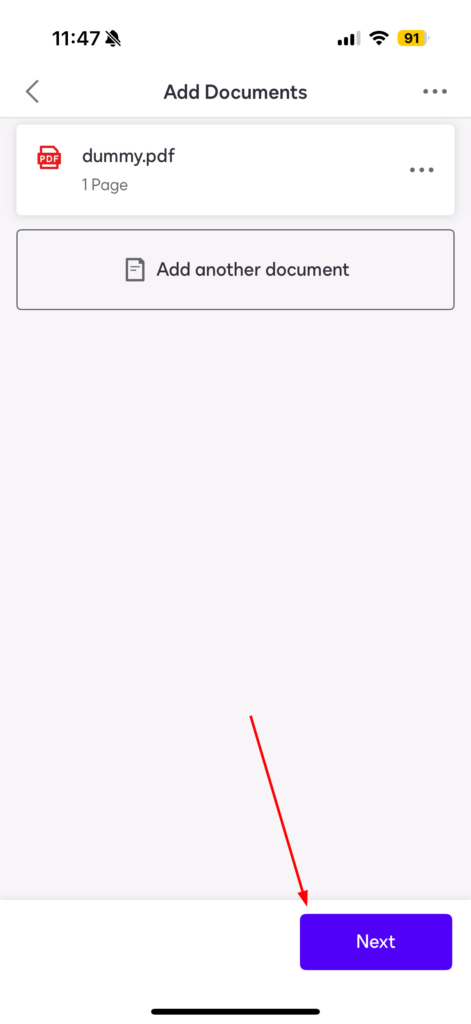
- Once you have your file(s) added, click “Next”
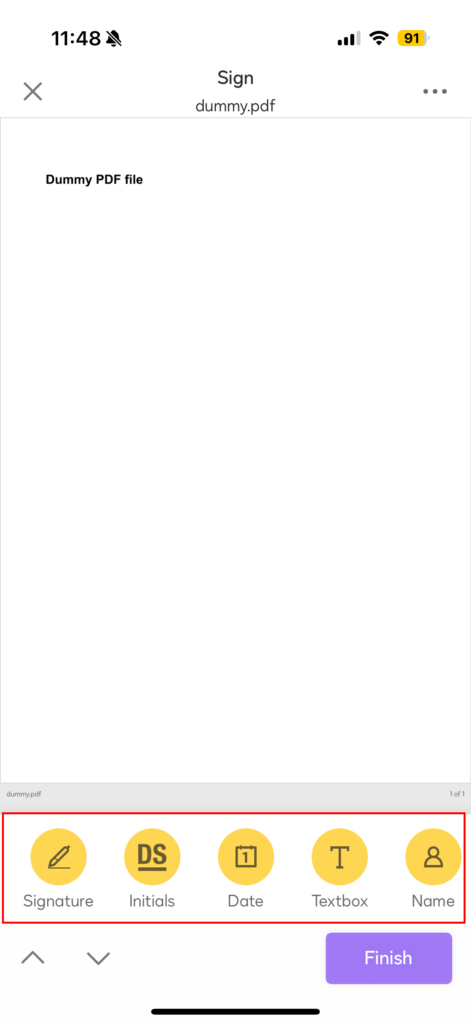
- Add your signature and other elements at the bottom of the screen then click “Next”
- Click “Finish Signing”
- Now select your document
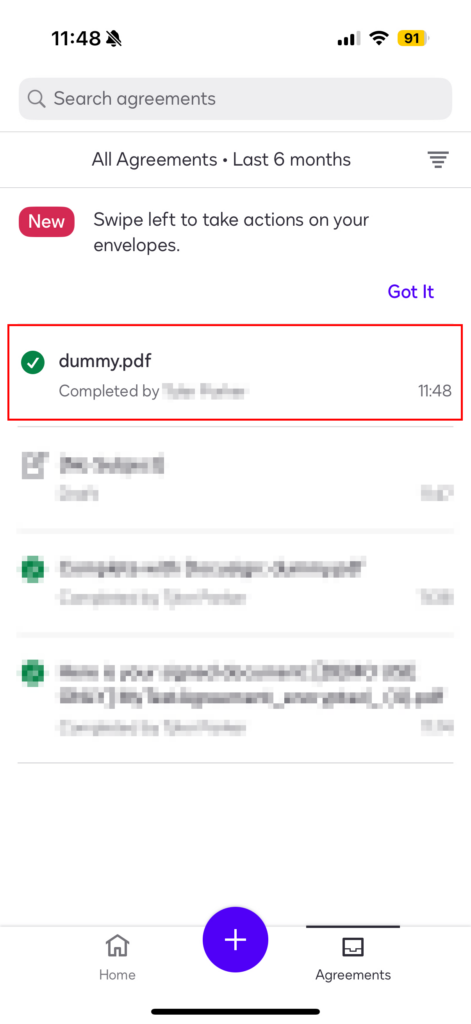
- Here you can view and share your document
