
This guide will walk you through disabling all Windows sounds to prevent unwanted noise.
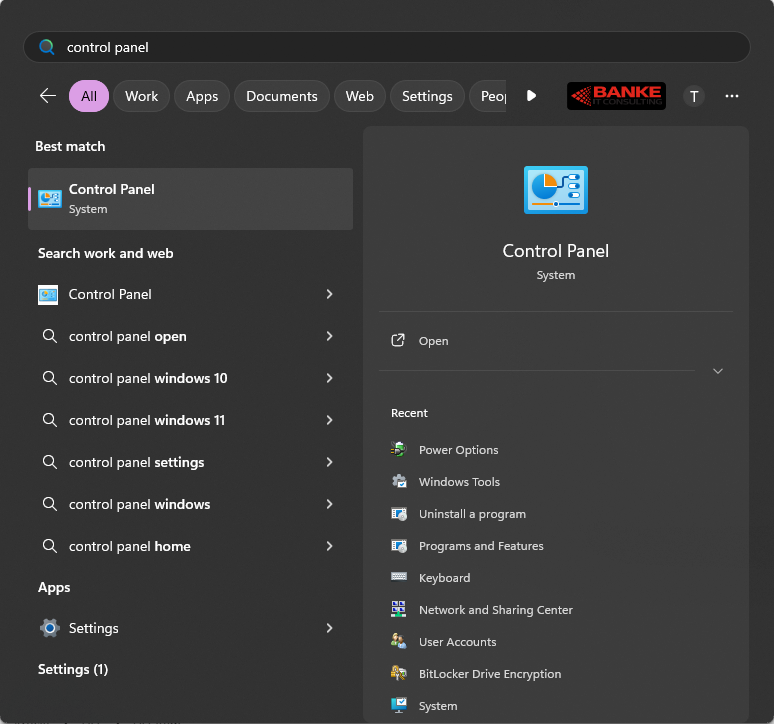
- Click the Windows Icon, then type “Control Panel” and open the app
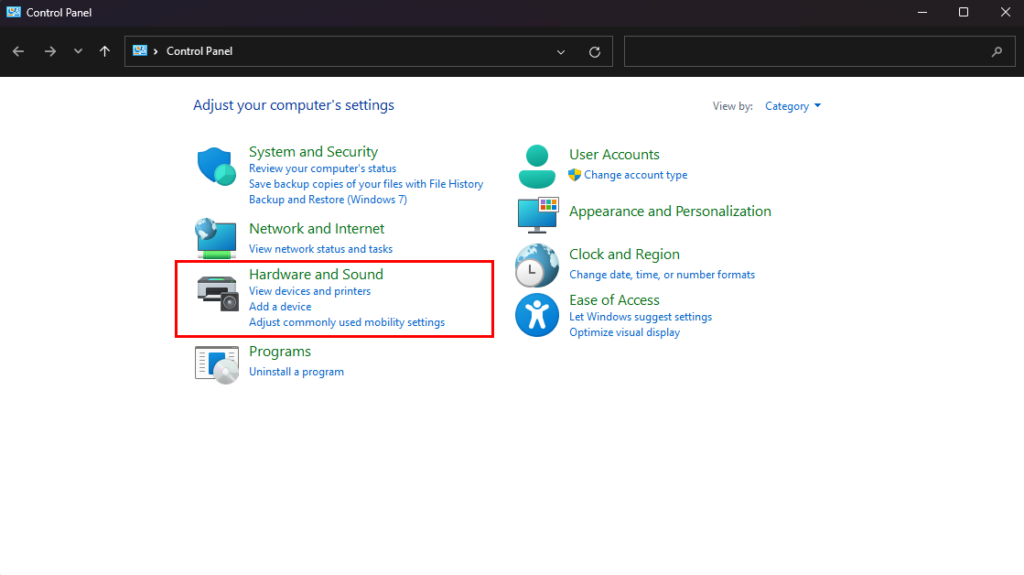
- Select “Hardware and Sound”
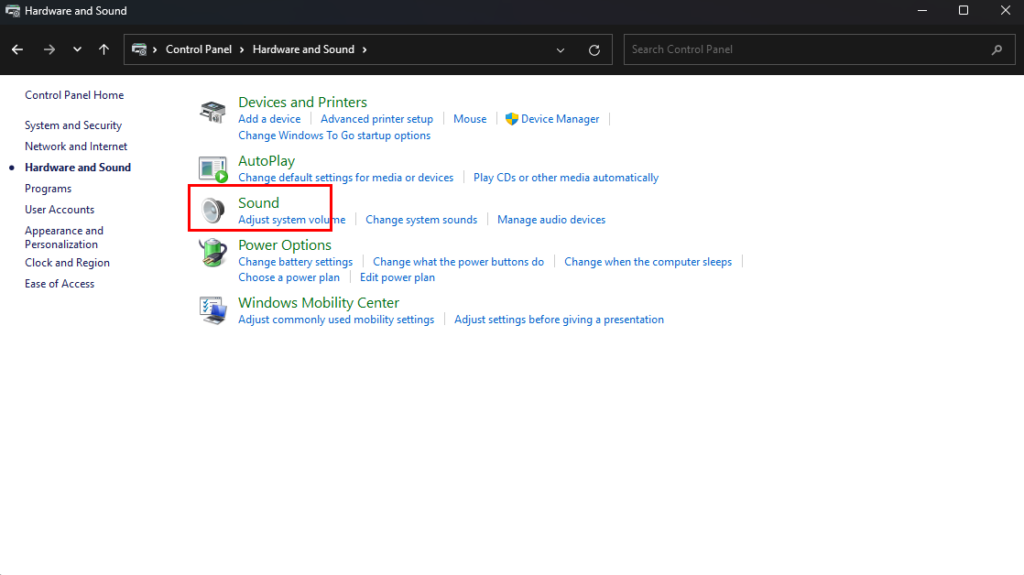
- Select “Sound”
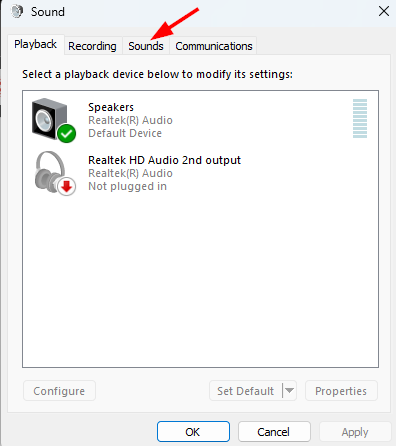
- This will open a new window, select the “Sounds” tab
- Here, select the Sound Scheme dropdown and change it from “Windows Default” to “No Sounds”
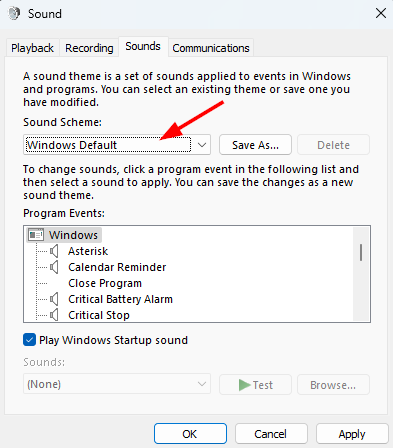
- Click “Apply”