
This article will walk you through changing the font color of emails that are from specific senders so that they can stand out.
Outlook Classic
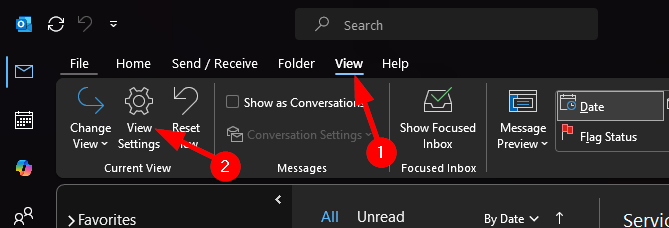
- Navigate to the “View” tab in the toolbar
- Click on “View Settings”
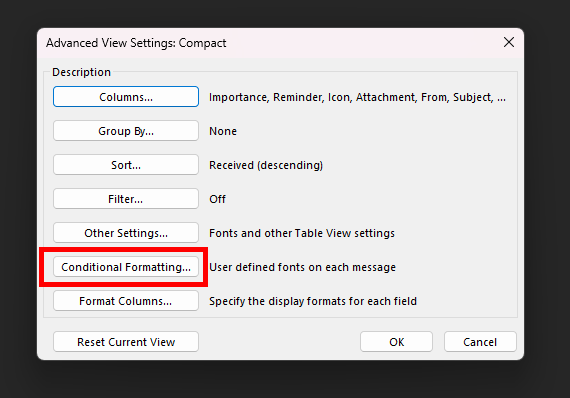
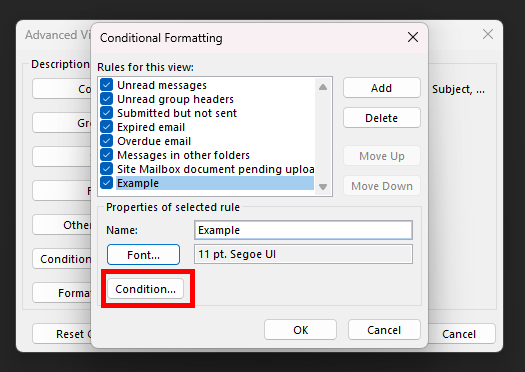
- Select “Conditional Formatting”
- Select “Add” and then name your rule
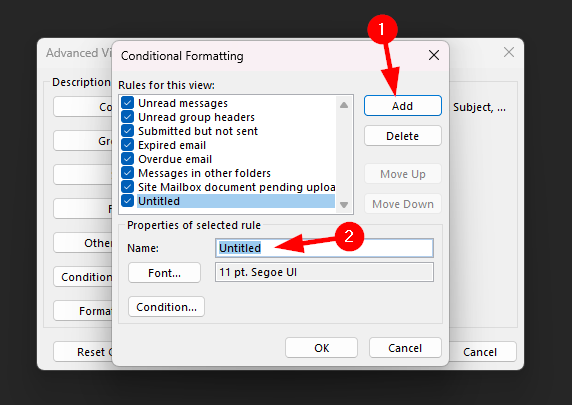
- Click “Font”
- This will open a new window where you can change the font, color, size, style, etc. to your liking
- Choose a color that will stand out to you, you can also select “Bold” or “Semibold” under the Font Style to make it stand out even more if needed
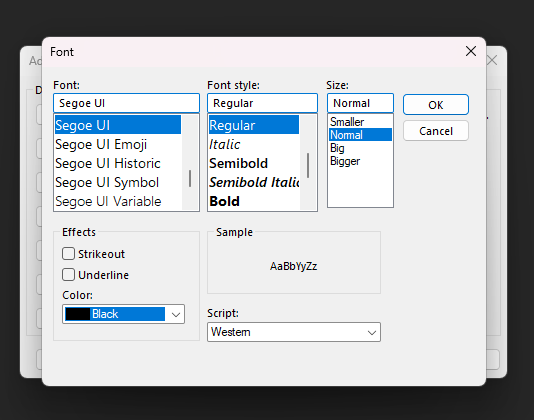
- When you are done, click “Ok”
- Click “Condition”
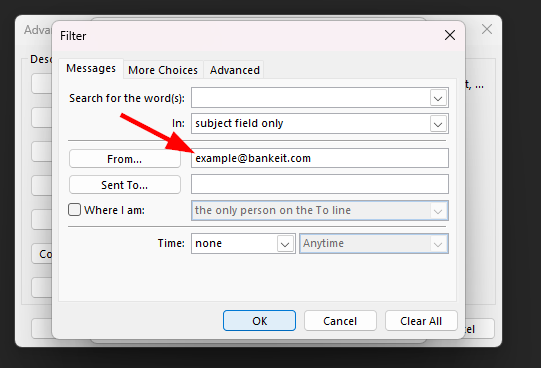
- In the “From” field, enter the email address of the person you would like to be highlighted
- Click “Ok” until all windows are closed (it should be 3 times), emails from the person you added to the rule should now be shown in the color you selected
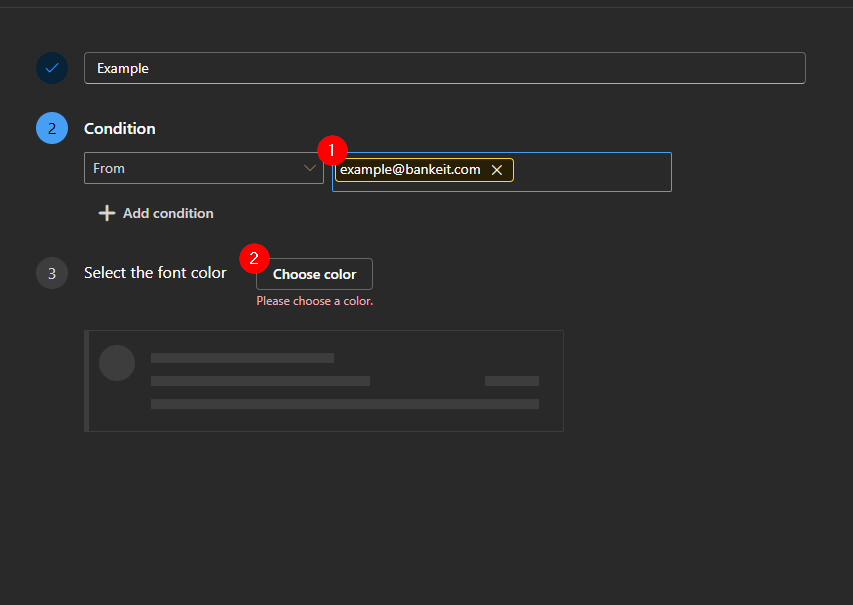
New Outlook
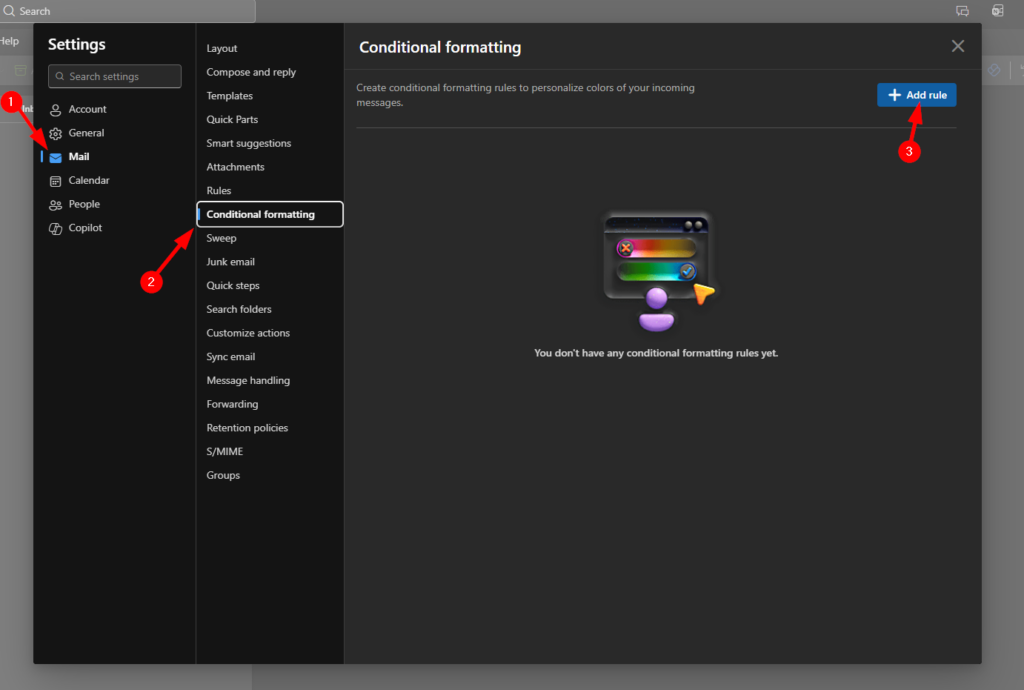
- Click on the settings icon in the top right
- Click on (1) Mail, then (2) Conditional Formatting, then (3) Add Rule
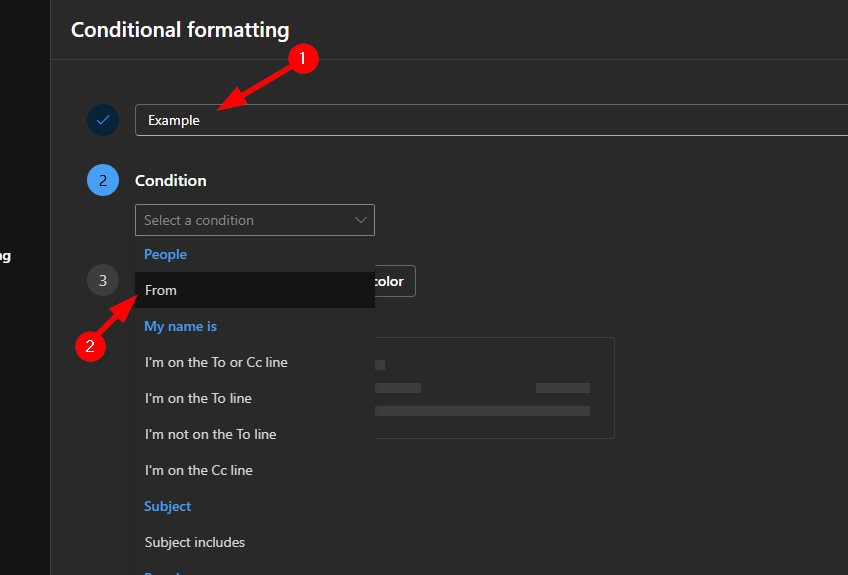
- Name your rule, then click on the “Condition” dropdown and select “From”
- Type in the email address(es) you would like highlighted
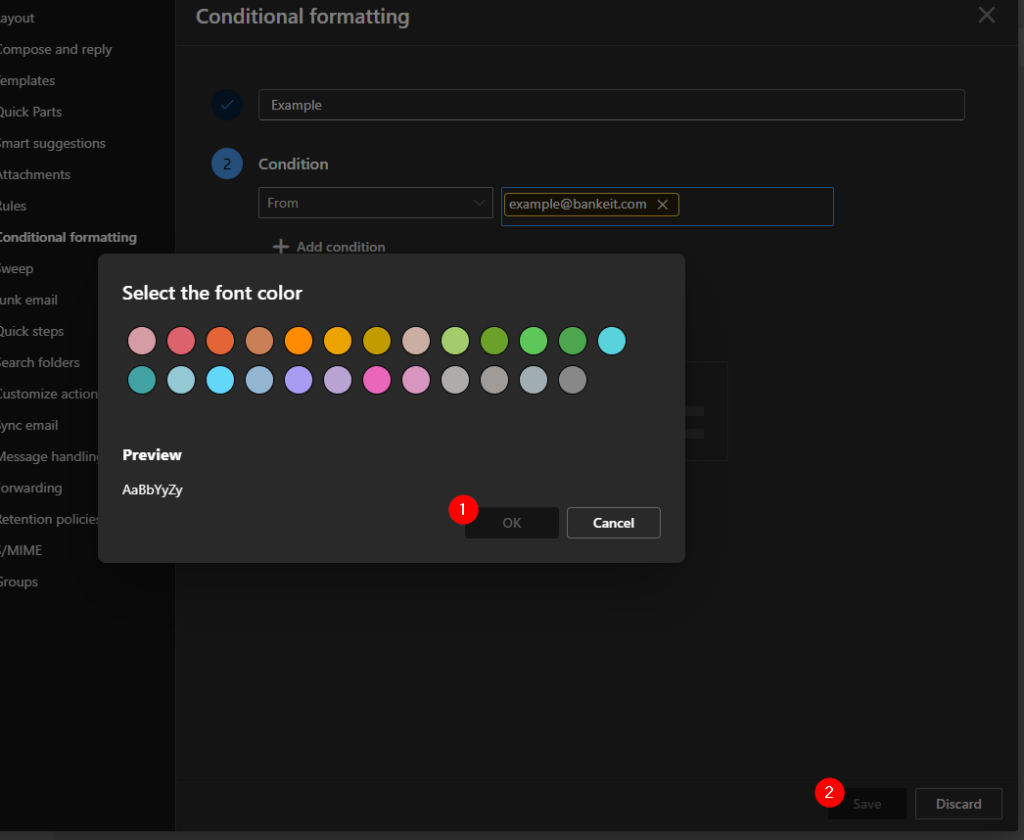
- Select “Choose color”
- Choose your color, then click “Ok”
- Click “Save”
- Emails from the senders you added will now be highlighted in the color you chose