This article will go over how to allow another person, called a Delegate, to access and manage your calendar.
There are 3 levels of permissions for delegates:
- Reviewer
- Delegates can view your items
- Author
- Delegates can view your items and create, edit, and delete their own, delegates can not edit or delete your items
- Editor
- Delegates can view, edit, create, and delete all items
How to make someone your delegate
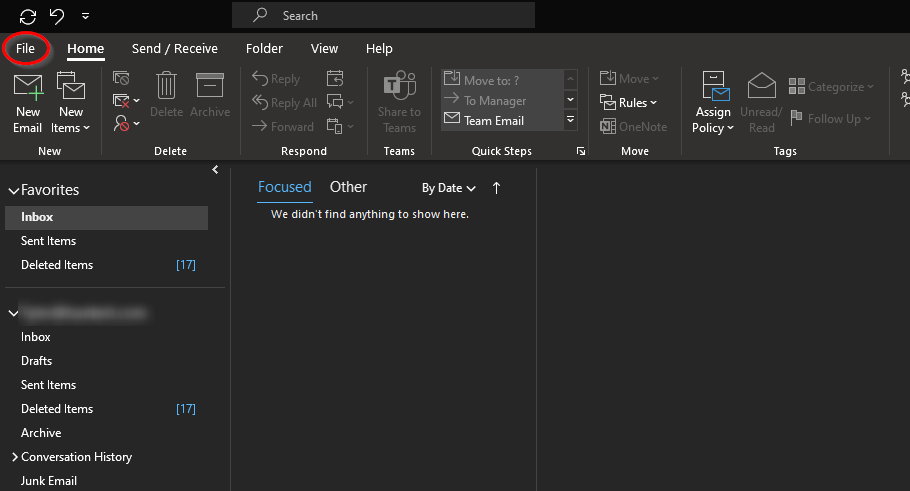
- Click the “File” tab in the top left
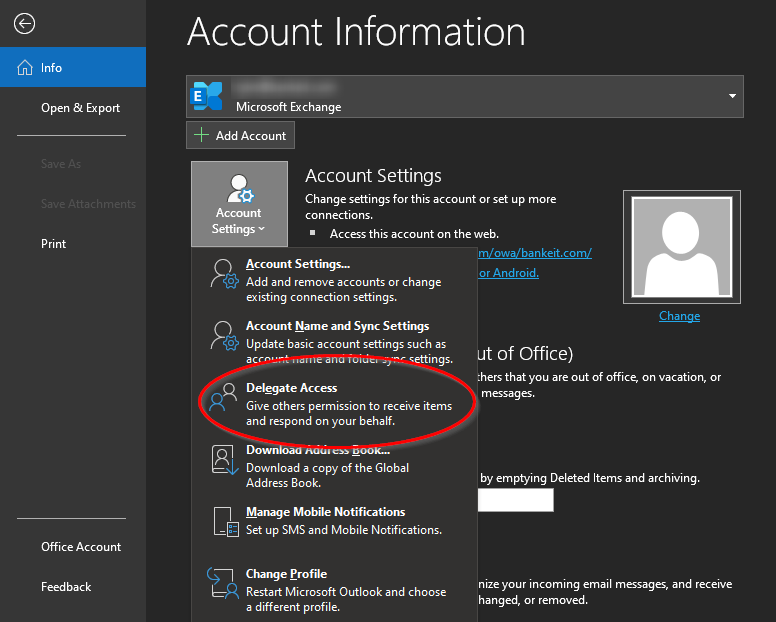
- Under the “Account Settings” dropdown, click ” Delegate Access”
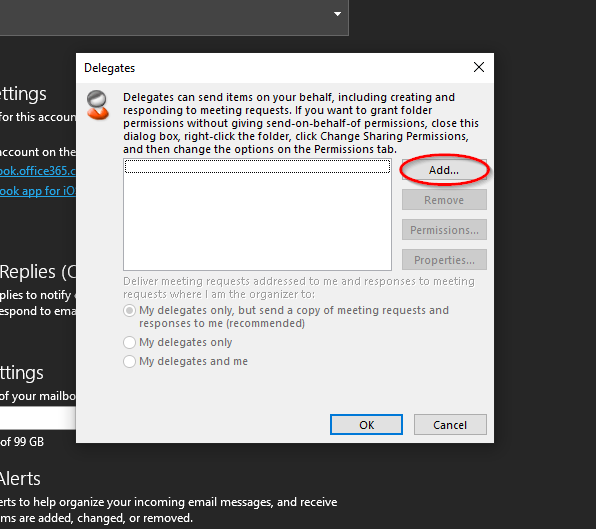
- Click “Add”
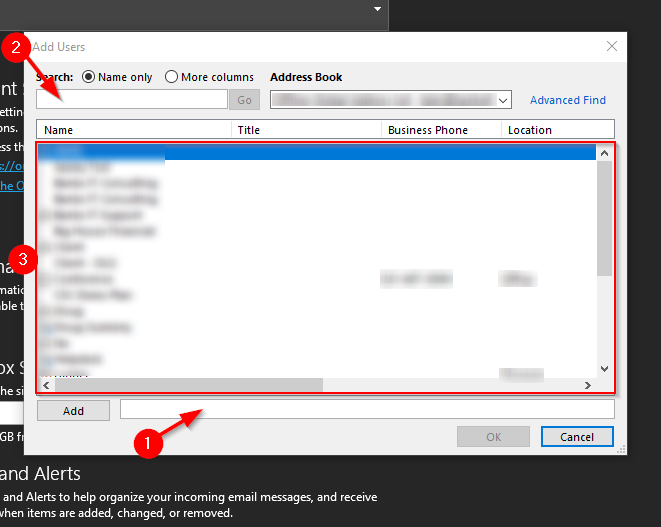
- (1) Type the name of the person whom you want to give access to, or (2) search for them and then (3) click the name of the person in the search results
- Once you have selected the person(s) click “Add,” then “Ok”

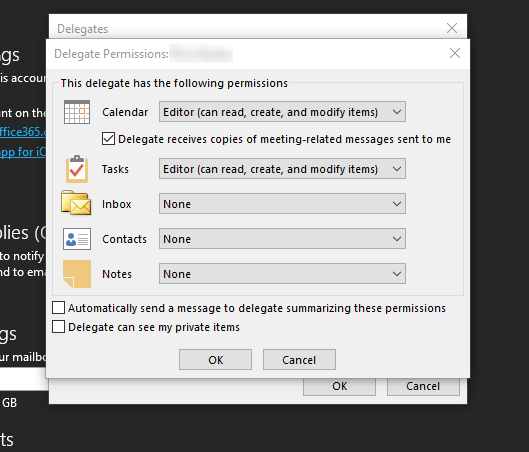
- Here you can select permissions for the person(s), choose which level of permissions you need, then click “Ok.” You can select “Automatically send a message to delegate…” to automatically send an email with instructions on how to access the shared calendar
(Note: each level is described at the top of this document and in the box where you choose them)