Encrypted emails provide another layer of security when working with confidential information. The following will show you how to send an encrypted email from Outlook and what the receiving party will see if they are using another email client.
How to Send Encrypted Email in Outlook
- Compose an email. Add your recipient, subject and body and any attachments as you would on a typical email.
- After creating a new email, go to the “Options” tab (1) at the top and then select “Encrypt” (2)
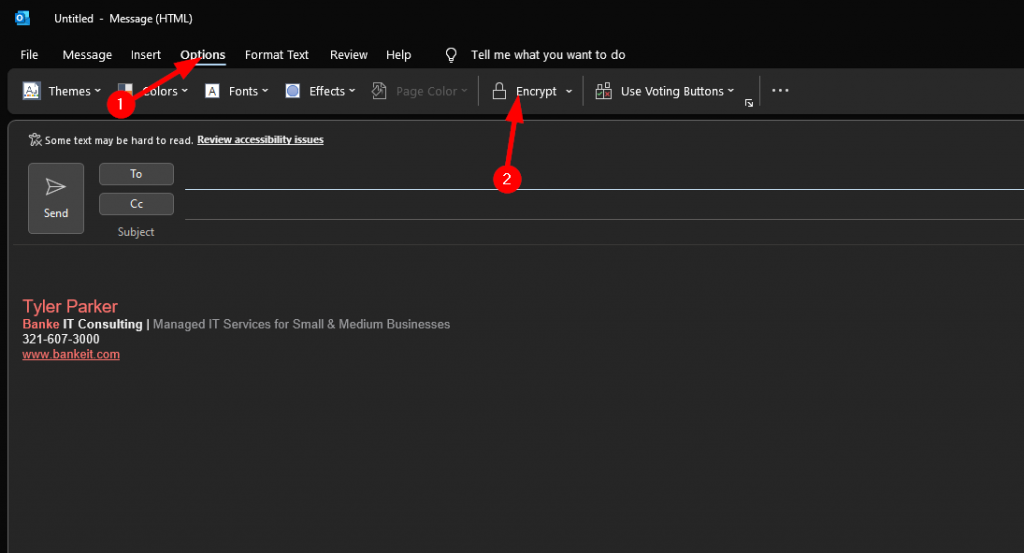
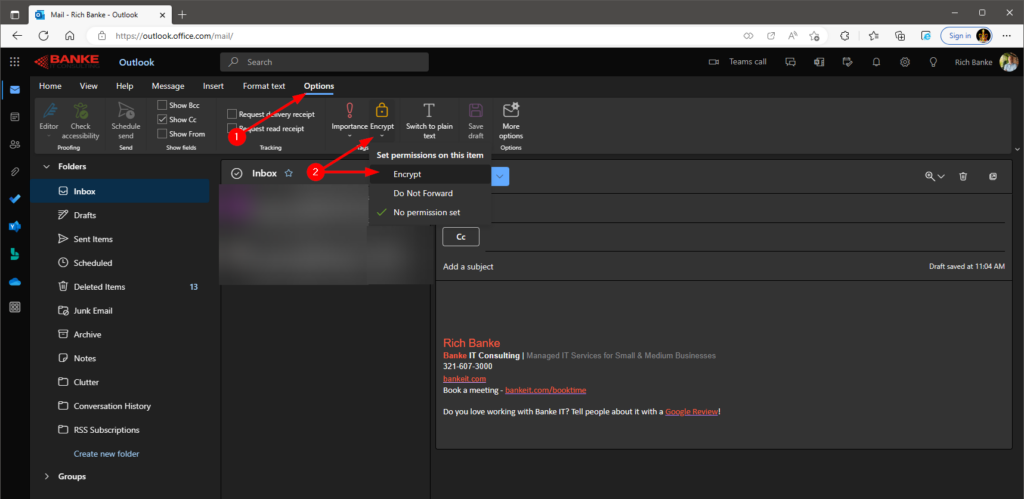
- You can now select the option that best suits your needs by clicking the dropdown next to Encrypt.
- Encrypt Only – This will encrypt the message and only allow the intended receiver to view it.
- Do Not Forward – This will encrypt the message but also deny the receiver from saving/forwarding the contents of the email.
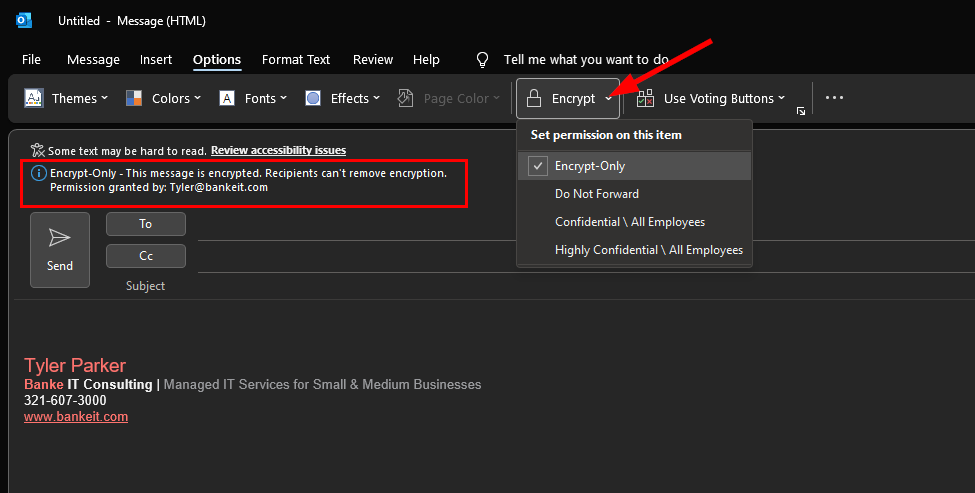
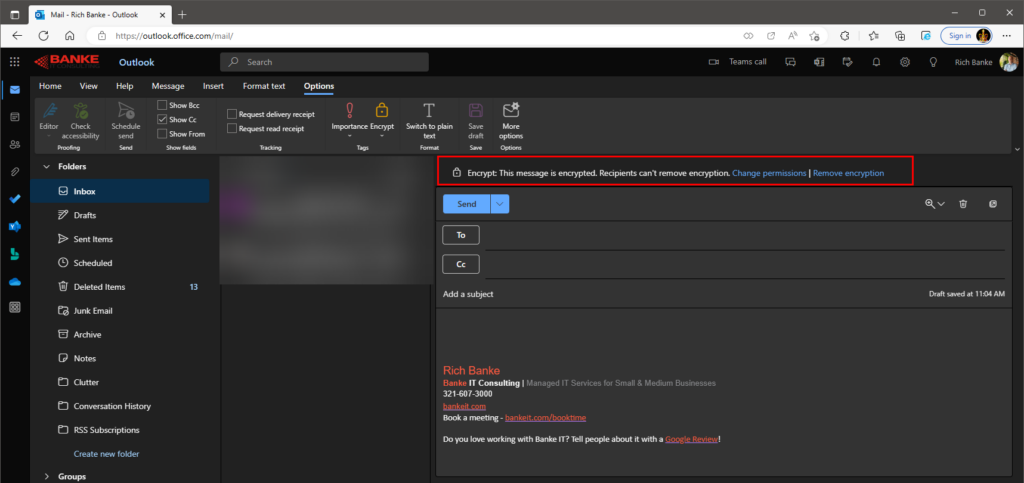
- Verify your email shows the encryption notice above the address field and you can now send your message.
Viewing Encrypted Emails
- If the recipient of your encrypted email does not have Microsoft 365, they will see the subject and instructions on how to access the message.

- The party receiving your encrypted message will see your email subject (1), Your name and email address (2), and a button to allow them to read the message (3).
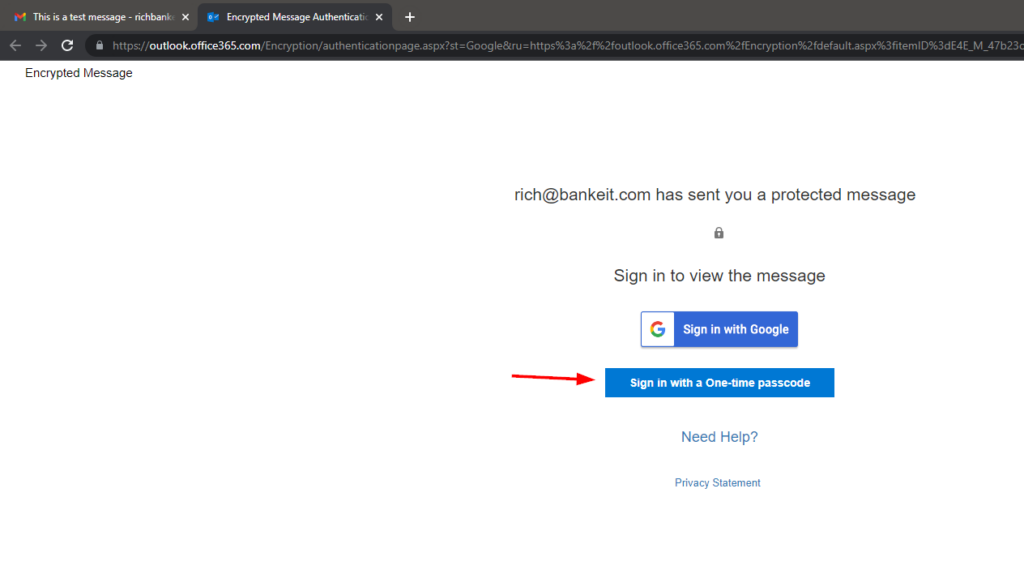
- Pressing the Read the message button will open a new web page allowing you to retrieve a One-time passcode.
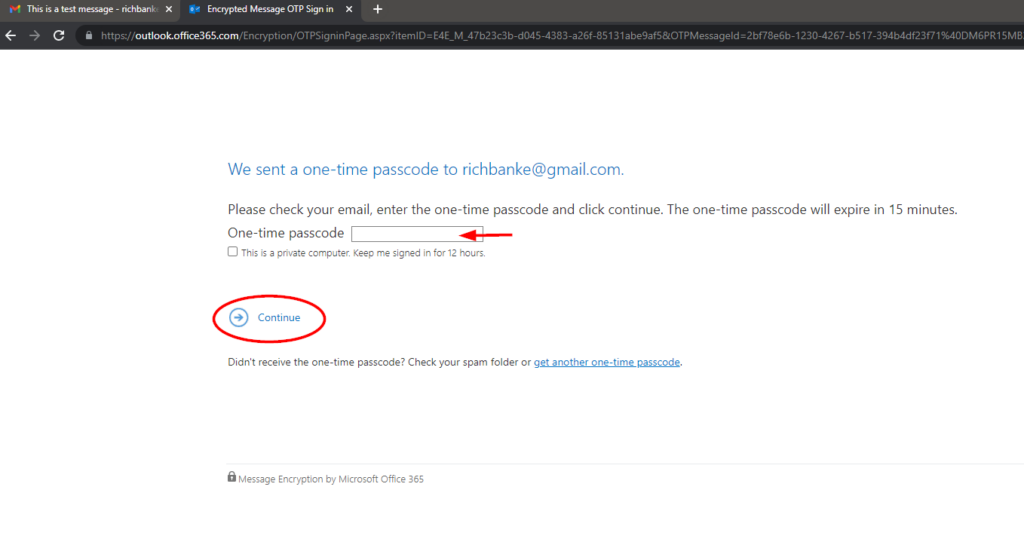
- Once selected you will receive an email displaying your One-time passcode. Enter that passcode in the field presented and press Continue.

The message will now be displayed like a typical email.
